
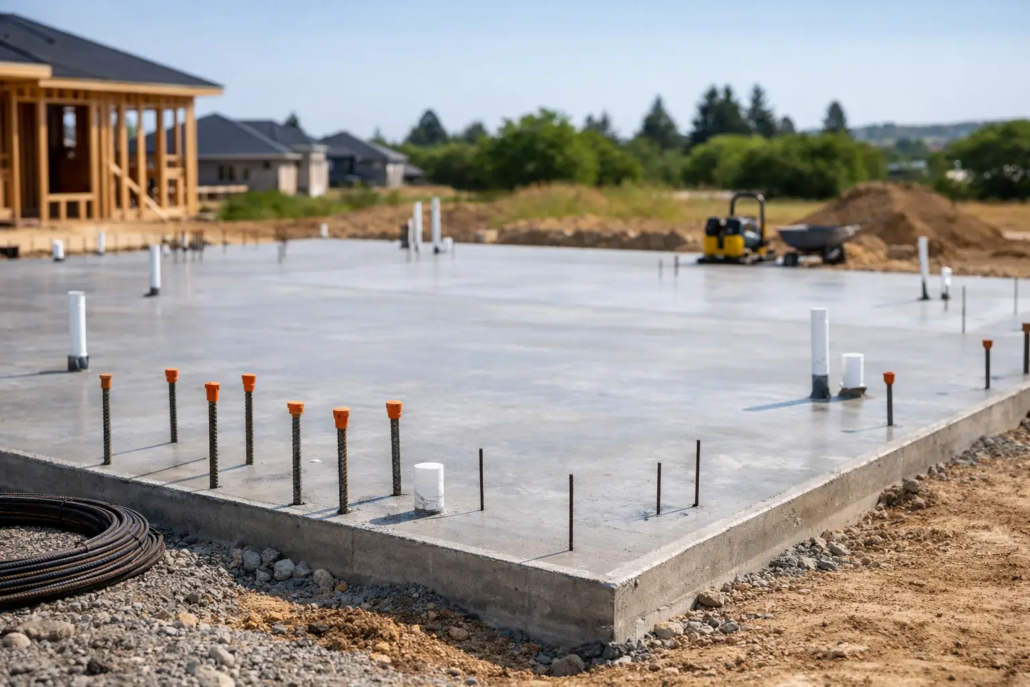
House Slab Construction Guide for New Homes
A house slab is not simply a layer of concrete beneath a new home. It is the structural base that carries walls, flooring, fixtures and daily loads for decades. This house slab construction guide explains the key stages that need to be planned and completed with care, from assessing the block through to curing the finished concrete.
For homeowners and builders, the main benefit of understanding the process is knowing what good preparation looks like before the concrete truck arrives. Most slab issues begin well before the pour, often with poor site drainage, inadequate ground preparation, incorrect set-out or rushed curing. A properly managed slab project protects the build above it and helps keep the construction schedule moving.
Start with the Site and Soil Conditions
Every house slab should respond to the conditions of its specific block. In South East Queensland, sites can vary considerably over a short distance, from reactive clay soils and sandy ground to sloping blocks, filled sites and areas with high groundwater. The slab design must account for those conditions rather than relying on a one-size-fits-all approach.
A soil test identifies the site classification and provides the information needed for an engineer to specify a suitable footing and slab system. This step matters because some soils expand and contract as moisture levels change. If movement is not properly allowed for in the design, it can contribute to cracking, uneven floors and stress on the structure above.
Before work begins, the site also needs to be checked for access, existing services, drainage paths and finished floor levels. The slab should sit at a level that works with the home design while directing surface water away from the building. On a sloping block, this may involve cut and fill, retaining work or a more specialised footing solution.
Choose the Right House Slab Construction Method
The right slab is determined by engineering, soil conditions, the building design and local approval requirements. For many new homes, a stiffened raft slab is common. It uses reinforced concrete beams beneath the slab to distribute loads and manage ground movement. A waffle pod slab is another option, using void-forming pods and reinforced concrete ribs to create an efficient structural base.
Homes on steeper or more difficult sites may require piers, suspended slabs or additional retaining and drainage measures. These systems can be highly effective, but they demand accurate engineering and experienced installation. The goal is not to select the most familiar option, but the system that suits the site and the home being built.
The slab design should also allow for load-bearing walls, garages, porches, step-down areas, bathrooms and any points where concentrated loads will occur. Decisions made at this stage affect formwork, reinforcement placement and service penetrations later on.
Prepare the Ground Properly
Ground preparation creates the stable platform beneath the slab. The site is cleared of vegetation, loose material, rubbish and unsuitable fill. Excavation then establishes the required levels and makes room for beams, footings and edge forms.
Where fill is needed, it must be placed and compacted in controlled layers. Uncontrolled fill can settle over time, leaving voids or uneven support beneath the slab. Compaction testing may be required to confirm that the prepared base meets the project specification.
Moisture management deserves close attention. Drainage should be considered early, not added as an afterthought once concrete is in place. The finished landscaping, downpipes, driveway levels and surrounding paths should all direct water away from the home. Persistent water around footings can affect soil performance and create avoidable maintenance concerns.
Set Out Formwork, Services and Vapour Barriers
Once the base is ready, the slab footprint is set out to the approved plans. Formwork establishes the edges, levels and shape of the concrete. Accurate set-out is essential because small errors can affect wall alignment, door openings, garage access and the connection between internal and external surfaces.
Plumbing and electrical services that need to pass through or beneath the slab are installed before concrete placement. Waste pipes, water lines, conduits and penetrations need to be located precisely and protected during the pour. It is far easier to verify these details before concrete is placed than to make changes once the slab has hardened.
A vapour barrier is laid across the prepared surface where specified. This membrane helps limit moisture movement from the ground into the concrete and the home above. Joints, tears and penetrations should be sealed or repaired so the barrier remains continuous. In a residential build, this is a small detail with a significant role in long-term performance.
Reinforcement Is More Than Steel in Concrete
Reinforcement gives a slab the tensile strength that concrete alone does not have. Depending on the design, it may include mesh, trench mesh, reinforcing bars, ligatures and starter bars for walls or columns. The reinforcement must match the engineering drawings in size, spacing and location.
Just as importantly, steel must be supported at the correct height. Reinforcement left on the ground or pushed down during the pour will not perform as intended. Bar chairs and spacers hold it in position and maintain the required concrete cover, helping protect the steel from moisture and corrosion.
Before the pour, a final inspection should check reinforcement laps, beam cages, penetrations, formwork bracing and finished levels. This is the time to resolve missing steel, misplaced pipes or damaged membranes. Once concrete is delivered, there is limited opportunity to correct underlying work.
Concrete Placement Needs Planning and Control
A successful pour is organised around access, crew numbers, concrete supply, weather and finishing requirements. The concrete mix must suit the engineered design and exposure conditions. Placement should be continuous where possible, with the team ready to spread, compact, screed and finish each section without delays.
Concrete is placed into forms and around reinforcement carefully to avoid segregation and voids. Mechanical vibration may be used in beams and thicker areas to consolidate the mix, but over-vibration can also cause problems. The surface is then screeded to level before the selected finish is applied.
For a typical house slab, the finish needs to suit the flooring that will be installed later. A smooth, level finish is often required beneath tiles, timber, vinyl or carpet, while garage slabs may need a durable finish with enough slip resistance for their intended use. Decorative concrete can be considered in visible areas such as alfresco zones, patios and pathways, but the structural slab itself should always take priority.
Queensland weather can change quickly, so the pour plan should account for heat, wind and rain. Hot or windy conditions can cause the surface to dry too quickly, increasing the risk of shrinkage cracking. Heavy rain can damage fresh concrete and affect the finish. An experienced concreting team monitors conditions and adjusts timing, protection and curing measures accordingly.
Curing Protects the Strength of the Slab
Concrete does not reach its intended strength simply because the surface feels hard the next day. It gains strength through curing, a process that requires suitable moisture and temperature conditions over time. Allowing a new slab to dry too rapidly can reduce surface quality and increase the risk of cracking.
Curing methods may include a curing compound, plastic sheeting, wet coverings or a combination of measures specified for the project. The method depends on the concrete mix, weather and finish requirements. Fresh slabs should also be protected from unnecessary foot traffic, heavy loads and trades that could chip edges or damage the surface before it has developed sufficient strength.
Some hairline shrinkage cracking can occur in concrete, even with sound workmanship. Control joints are placed to encourage cracking to occur in planned locations rather than randomly across the surface. Their placement should be considered alongside room layouts, doorways and future flooring finishes.
Coordinate the Slab with the Rest of the Build
The best slab work is coordinated with the entire project, not treated as an isolated trade. Finished levels need to align with driveway grades, patios, external paths, drainage and thresholds. Service locations must suit cabinetry, bathrooms and appliances. The builder, engineer, plumber, electrician and concreting contractor all need clear, current plans.
It is also worth keeping records of soil reports, engineering drawings, inspection outcomes and any approved variations. These documents provide useful reference during construction and can help future owners understand the home’s structural base.
A house slab is largely hidden once the build is complete, but it should never be an unseen compromise. Careful engineering, thorough preparation and disciplined installation create a foundation that supports every finish and feature above it. If you are planning a new home in Brisbane, Logan City or the Gold Coast, involve qualified professionals early and give the slab stage the attention it deserves.

