
How to Repair Concrete Spalling for Lasting Results
Concrete spalling rarely starts as a major problem. It may appear as a small flake on a driveway edge, a rough patch on a patio, or exposed aggregate coming loose around a pool surround. Left alone, however, the damaged area can spread, collect moisture and compromise both the appearance and service life of the slab. Knowing how to repair concrete spalling starts with identifying why the surface failed, not simply covering it with fresh mortar.
For Brisbane, Logan, Ipswich and Gold Coast properties, concrete is exposed to intense sun, heavy rain, humidity and regular wet-dry cycles. These conditions can reveal weaknesses in older surfaces or accelerate damage where water has found its way into the concrete. A well-prepared repair can restore a clean, durable finish. A rushed patch over a damp or unstable surface usually will not last.
What concrete spalling looks like
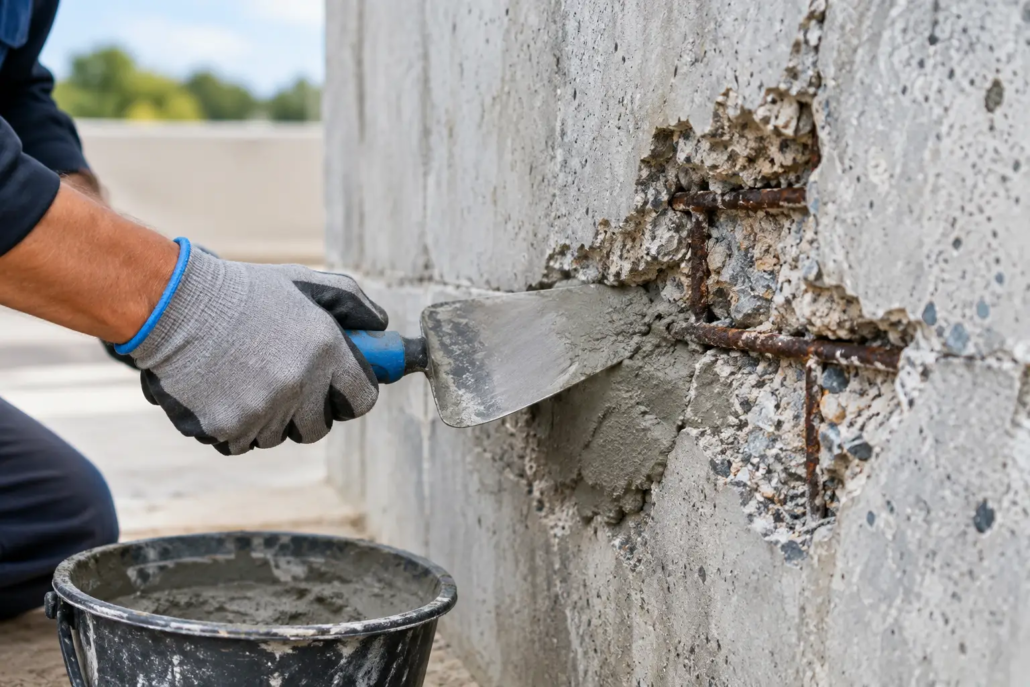
Spalling is the term used when the concrete surface breaks away in flakes, chips or shallow pieces. It can range from minor surface scaling to deeper sections where the coarse aggregate is exposed. On reinforced concrete, severe spalling may eventually expose steel reinforcement, which requires professional attention.
It is often confused with ordinary hairline cracking. A crack is a line through the concrete, while spalling involves material physically separating from the surface. You may notice pitting, hollow-sounding areas, crumbling edges, rusty staining, loose aggregate or uneven patches where the top layer has lifted.
The right repair depends on the depth and cause of the damage. A thin layer of surface scaling on a footpath is very different from a driveway slab with deep breakouts caused by corroding reinforcement.
Why concrete spalls
Concrete is durable, but it is not waterproof and it is only as reliable as its original placement, curing and ongoing drainage allow. Spalling may occur because the surface was finished too early, cured poorly, mixed with too much water, or exposed to unsuitable products. It can also develop when moisture enters existing cracks or poorly drained areas.
In coastal and humid parts of South East Queensland, moisture and salts can be especially hard on reinforced concrete. When steel within a slab corrodes, it expands and pushes against the surrounding concrete. The result is cracking, rust stains and sections breaking away. This is not a cosmetic issue alone. It needs a repair method that addresses the steel and stops moisture from returning.
Damage can also be caused by vehicle impacts, heavy loads near slab edges, aggressive cleaning chemicals, poor falls that allow water to pond, or a failing coating. Decorative concrete needs the same careful diagnosis. An exposed aggregate driveway, coloured patio or polished floor should be repaired with materials and finishing methods suited to its intended appearance.
How to repair concrete spalling: assess the damage first
Before picking up a grinder or repair compound, check the affected area carefully. Tap around the damage with a hammer. Sound concrete gives a solid response, while delaminated concrete can sound hollow. Mark any weak sections beyond the visibly broken edge, as these also need to be removed.
A DIY repair may be appropriate for a small, shallow area with no cracking beyond the surface and no exposed steel. The slab should otherwise be stable, with no signs of movement, widespread hollow sections or ongoing water problems.
Arrange a professional assessment when spalling is deep, widespread or occurring on a structural slab, suspended balcony, commercial floor, retaining structure or pool shell. The same applies if reinforcement is visible, rust staining is present, or a driveway is cracking and sinking at the same time. Patching the surface without resolving structural movement or steel corrosion can make the damage look better temporarily while it continues underneath.
Prepare the repair area properly
Preparation is where long-lasting concrete repairs are won or lost. The repair material needs a clean, sound and textured surface to bond to. Do not apply repair mortar over loose concrete, dust, paint, sealer residue or standing water.
Start by removing all unsound concrete with a hammer and cold chisel, or suitable mechanical tools for larger areas. Cut or square off weak edges where practical rather than feathering the repair material to a thin edge. Thin feather edges are prone to breaking away again.
Clean the area thoroughly, removing dust, laitance, oil and debris. A pressure cleaner can help, but allow the surface to dry or reach the moisture condition recommended by the repair product before application. If oil has soaked into a garage floor or driveway, it may need specialised cleaning or mechanical surface preparation to achieve a reliable bond.
Where reinforcement is exposed, carefully remove loose concrete from around the steel and clean corrosion back to sound metal. The steel may require a corrosion-protection treatment before the patch is applied. If the reinforcement has lost significant thickness or the affected section is extensive, this work should be designed and completed by an experienced concreting or remedial repair team.
Choose a repair material that suits the job
For shallow surface defects, a polymer-modified concrete repair mortar is commonly used because it offers good adhesion and is formulated for thin repairs. Deeper breakouts may require a structural repair mortar or a concrete mix suitable for the depth being placed. Always follow the product’s stated minimum and maximum application depths.
The material needs to suit the location. A repair on a horizontal driveway must withstand tyres, weather and abrasion. A vertical edge needs a non-sag product. A pool surround must cope with moisture exposure, while a commercial warehouse floor may require a higher-strength system designed for traffic and impact.
Colour matching is another consideration. Fresh repair mortar will rarely match aged grey concrete immediately, and it may never disappear completely on a plain slab. On decorative finishes, a local patch can be even more visible. Resurfacing a larger section or the whole surface may provide a more consistent result where appearance matters as much as function.
Apply and finish the concrete repair
Dampen the prepared concrete if the chosen product calls for a saturated surface-dry condition. This means the concrete is damp internally but has no pooled water on its face. Apply any bonding agent only where it is specified by the repair system. Some modern repair mortars are designed to bond directly to properly prepared concrete, so adding an unapproved bonding product can work against the repair.
Mix small batches to the manufacturer’s water ratio. Adding extra water might make mortar easier to spread, but it reduces strength and increases shrinkage. Press the material firmly into the repair area to remove air pockets and build it up in layers if the depth requires it.
Strike the repair level with the surrounding surface, then finish it to suit the existing concrete. A driveway or path generally needs a broomed texture for slip resistance. A patio may have a trowelled finish, while exposed aggregate and stamped concrete require more specialised blending. Keep the repair just below surrounding high points where needed to maintain drainage rather than creating a puddling spot.
Cure the patch and deal with the original cause
New repair mortar needs curing, not just drying. Protect the area from direct harsh sun, heavy rain, traffic and premature washing while it gains strength. Follow the product’s curing instructions closely, particularly before driving a vehicle over a repaired driveway or placing furniture back on a patio.
Then address what caused the spalling. Clear drainage channels and downpipes that discharge onto the slab. Seal cracks where appropriate, correct water ponding and avoid harsh acid washing. If a coating or sealer is being applied, wait until the repaired concrete has cured for the required period and use a system compatible with the surface.
For decorative concrete, the repair plan should include the final visual outcome from the beginning. A resurfacing finish, coloured coating or professionally applied decorative treatment can help unify repaired areas while also improving protection against weather and wear.
When resurfacing is a better option
Spot repairs make sense when damage is isolated. When a driveway, patio or footpath has multiple spalled areas, patching each defect can leave a mottled finish and may not address widespread surface weakness. Resurfacing can be a better choice once all loose material has been removed and the underlying slab is confirmed sound.
A professional resurfacing system can renew the surface, improve slip resistance and provide a more consistent appearance across the whole area. It is not a fix for movement, deep structural cracking or badly deteriorated concrete, so assessment still comes first.
The best repair is one that suits the slab, the cause of damage and the finish you expect from the space. If the concrete is breaking away in more than one location or the repair needs to match a feature surface, getting experienced advice early can prevent a small defect becoming a larger replacement project.

